
1) First I decide on a theme and title, this comic is going to be next in my "At The..." series titled At The Theme Park. So, I start with a rough plan in my sketchbook of the idea and how it looks in my mind. This is my favourite part of the process, I like the way the rough sketches look more than the final thing usually:

2) From this I draw a more detailed full size rough using a "Happy Days" jumbo ink tank gel ink pen in 0.5mm on thin cheap printer paper. I usually draw at double print size, this will be an A5 cover so in this case I'm drawing at A4:

3) I then use a lightbox to draw a final version of this using an extra fine Rotring art pen on a thicker better quality paper. Here I draw the layers of the drawing so for a complicated cover like this there are four separate A4 pages each with various parts of the final drawing:


5) I use the second rough drawing to check everything is in place and label each layer to make things easier:


6) Next step- I spend a while editing any mistakes and making sure each layer is in place:

7) Now the least fun part, colouring. I don't really enjoy this bit but that's probably because I haven't got a drawing tablet at the moment which would make things easier. I prefer colouring things by hand rather than on a screen. I generally look at things for colour inspiration like this Walt Disney World "Treasure Book of Memories" (ha) and refer back to my original colour plan. I usually start with a background colour which will be the main colour I use for the interior of the comic too (in this case purple) and then I build up a colour palette that is usually pastel rainbow colours of some kind:


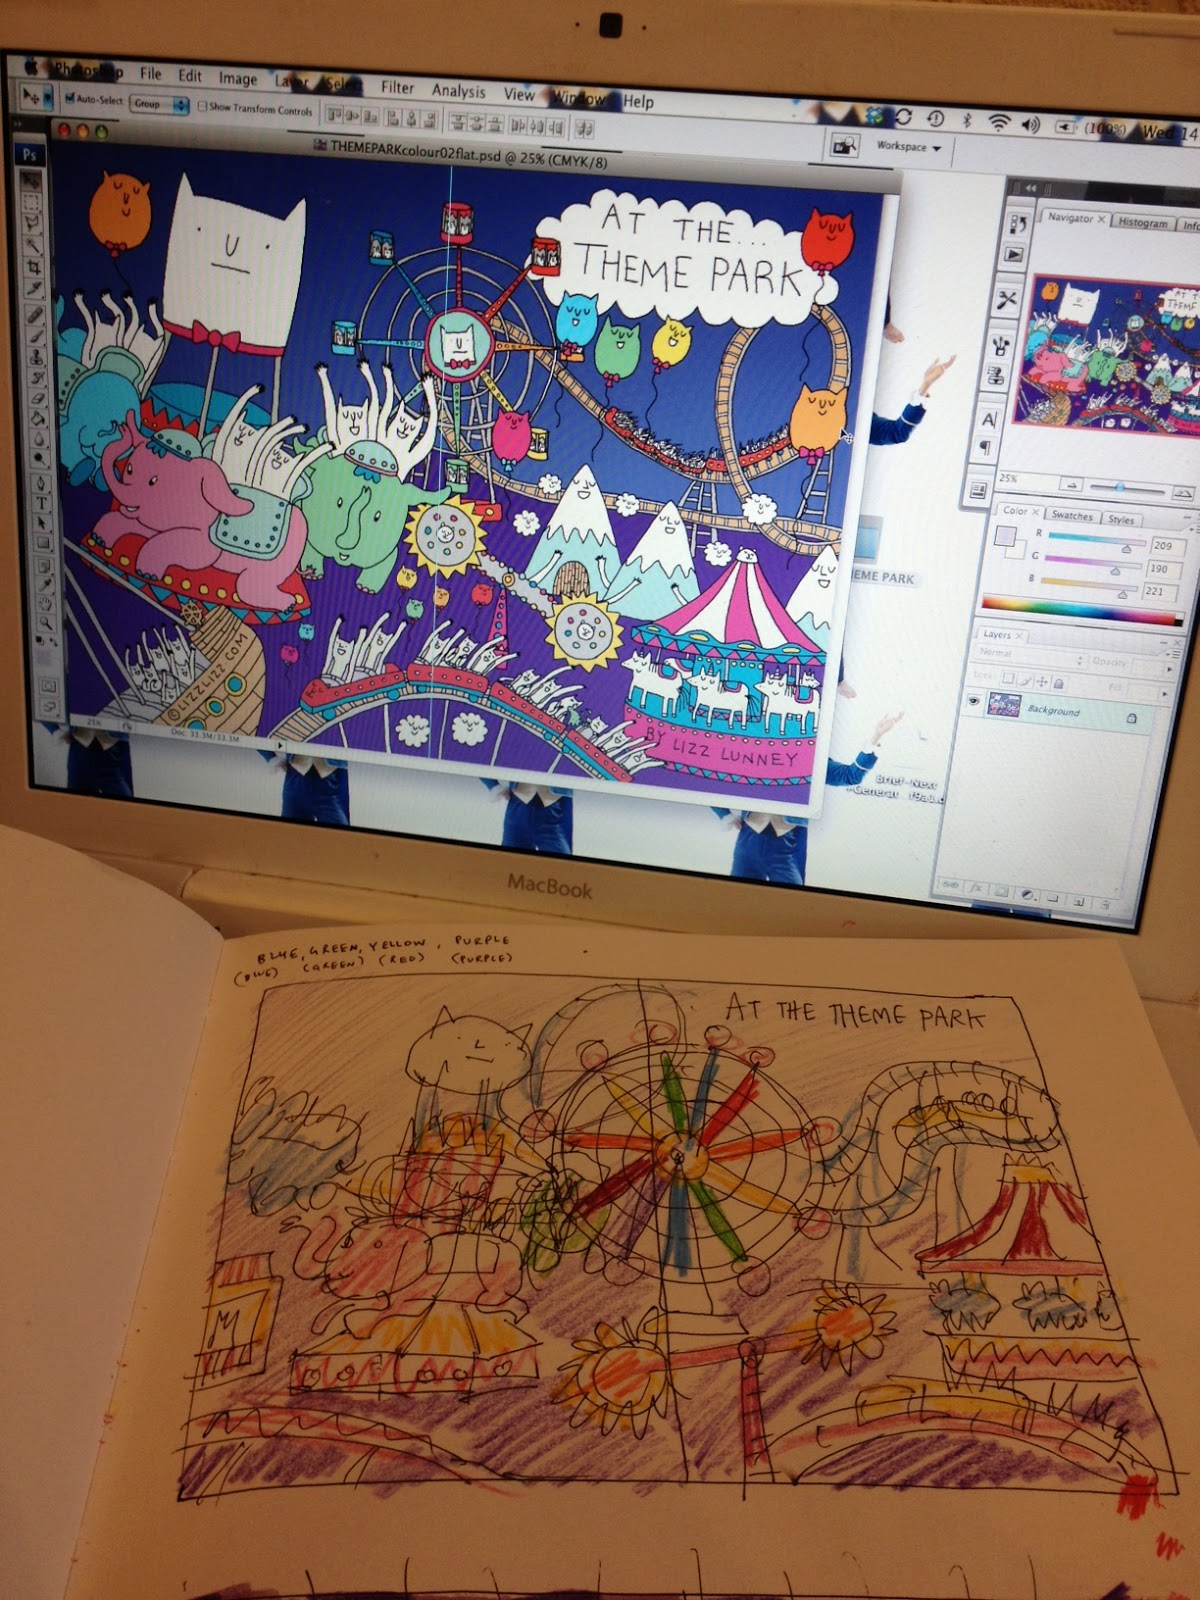
8) Hours later (crying) I end up with something presentable that I will probably look at the next day and completely change before it goes to print:

If anyone would like to colour this design themselves I'm going to be sharing the files here for your enjoyment. I'd love to see any alternatives people come up with, feel free to grab the files and do what you want with them (but please don't sell them of course) You could even print it out and colour it in by hand. Send me a link or email me with anything you do- I'm interested in seeing other people's techniques!
I will be resuming the One A Day comics on my website as soon as I can get back to it. I'll probably put a couple up when I can....


2 comments:
that's amazing! :D i really love your work!! one question though, how do you colour without getting it out of the lines since it's scanned??
Hello! I might do a blog post on colouring when I get chance. I think everyone has their own method of colouring, I have various methods that I use but in this case I just used the fill colour tool so I select the area that requires colour then in a new layer fill colour in that selection. The other method I sometimes use is to separate the line work and colour behind them. That might not make any sense typed in a comment reply but hope that helps a bit! Thanks for asking.
Post a Comment